It’s so simple to describe my process of creating fabric collage quilts that most people get it right away.
- Free-hand cut fabric to shape.
- Glue fabric to foundation.
- Assemble top, batting, and backing, then quilt.
But wait…
Step 2 is glue fabric to foundation? Glue? Really?
Yes, really. I get asked about it at lot and the questions generally fall into one of three categories:
- Why adhesive at all?
- Why glue instead of a fusible?
- How do you do it?
Why Adhesive At All?
The primary reason for using glue is immediacy. Glue allows me to use fabric the way other artists use paint. Grab a piece of fabric, cut it, maybe recut it, pin it, glue it. Done.
My first collages were made of paper while I was in college. I used spray adhesive. I liked collage a lot, even developing a small “library” of images cut from old books and magazines. (Ah, the pre-internet days!)
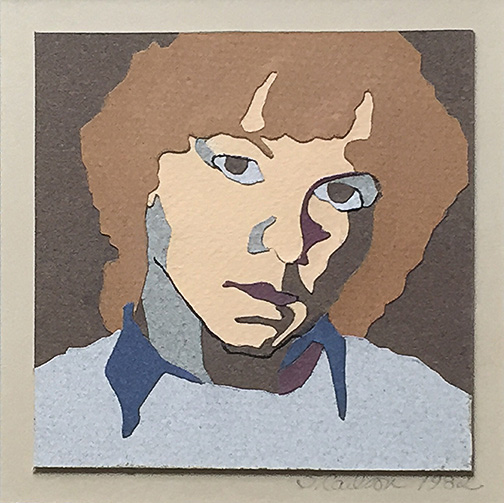
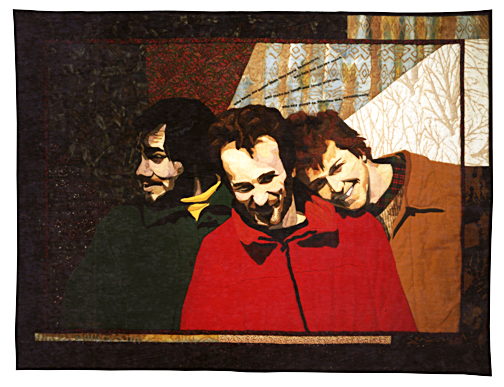
So when I first decided to try glue as a tool in fabric collage, I used spray adhesive. The quilt of my husband and his two college roommates, “Surprise Me,” was made using spray adhesive. It was what I was familiar with and it worked fine.
Except I didn’t like the potentially toxic fumes of spray adhesives. If I was going to be doing more pieces, I didn’t want to be breathing that stuff in. I figured that in the long-term it wasn’t the best idea.
Also, it was annoying to pick up each piece of fabric in order to spray the back of it. After spending the time and effort to get a piece cut to exactly the right shape and positioned in just the right spot, I wasn’t crazy about moving it again. (This is the same beef I have with glue sticks, which some students also consider using.)
So that led me to try plain-old, white, craft glue. It’s non-toxic both for breathing and for contact. I soon found that a tiny dab could be smeared on the center of each piece while it’s still pinned in place. Press it down and it’s attached. I had solved both problems.
There are lots of white craft glues out there. The first one I ever used was Aleene’s. I still use it today. Aleene’s has since come out with a whole line of different glues and other adhesive products, but I still use Aleene’s Original Tacky Glue.
I’m sure part of the reason I still use Aleene’s Original is just plain old habit. But it does have two properties I really like. First of all, the consistency seems just right, neither too runny nor too goopy. Second, if applied correctly (more on this later), it dries soft and pliable (more on this later, too).
Why Glue Instead of a Fusible?
Fusibles—iron-on mesh adhesives—have grown in popularity since I began making fabric collage quilts. Many of my colleagues use fusibles. Since fusibles are already in many of my students’ toolboxes, so to speak, they’re curious why I don’t use them.
Again, the biggest reason is immediacy. If while I’m piecing I want to have a dab of red, I rifle through all my reds (and all my fabrics that simply contain red). I have lots of options. But if I have to choose head of time (limiting my options before I even get started), pretreat the fabric, then grab and cut, that’s one step too many for me, for my immediate, serendipitous process.
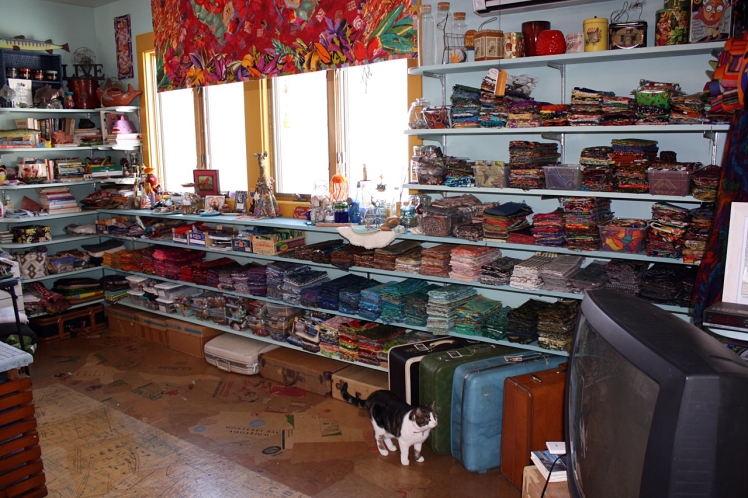
Besides, I own thousands of fabrics. Some chunks are folded neatly. Other bushels of scraps are stuffed into suitcases. If I wanted to make all of it available to me to use, I’d spend all my time applying fusible instead of actually creating.
Oh yeah, and tell me which side am I supposed to apply the fusible to? I sometimes use the back side of a piece because it has exactly the shade of color I’m looking for.
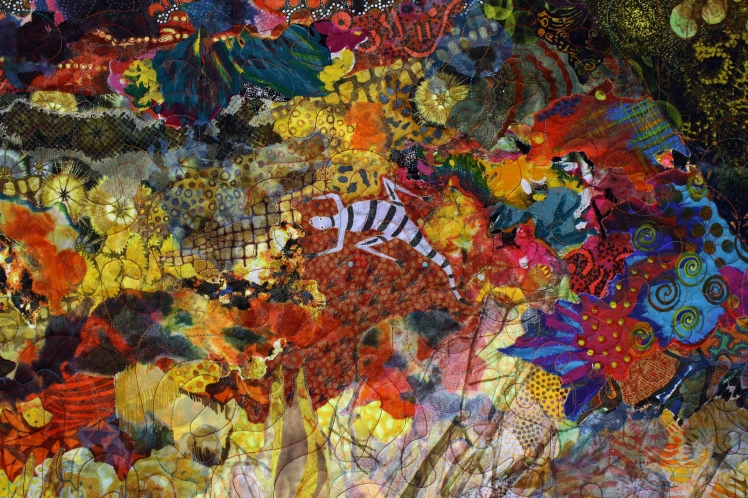
Other than immediacy, the other reason I don’t use fusibles is because of how stiff they feel. I apply multiple layers of fabric—four, five, six or more—especially in parts like eyes, mouths and other facial features. Imagine how stiff it would become with four, five, or six layers of fusible added.
When applied properly (more on this later, I promise), glue dries thin and flexible. My quilts still feel like quilts. Despite my untraditional construction and design, retaining that tactile flexibility of fabric is important to me.
Fusibles are great for many applications (no pun intended). My friend Laura Wasiloswki is a member of a group called the Chicago School of Fusing. They do wonderful work. Fusing suits their styles. And isn’t having different styles what it’s all about?
How Do You Do It?
Fabric collage—the way I do it anyway—goes through as many as five stages of permanence, giving me lots of chances to change, remove, cut, cover up, augment, and allow discovery.
- Placing cut pieces of fabric on a foundation.
- Pinning.
- Tacking with glue.
- Permanently gluing.
- Quilting.
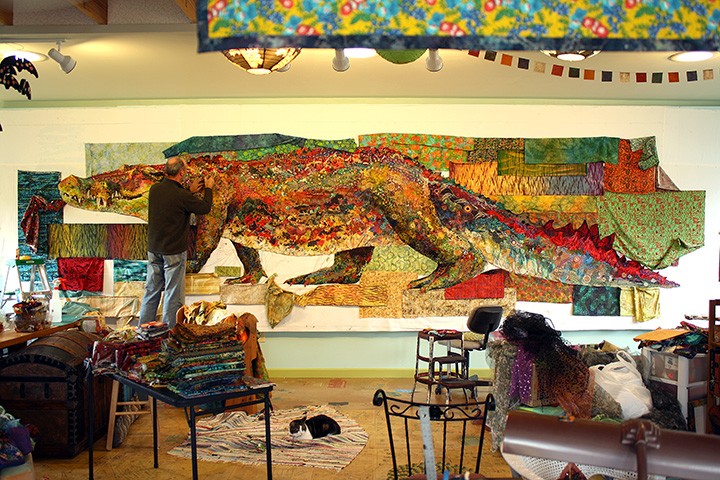
When I first cut a piece of fabric, I lay it down on a foundation—muslin or other inexpensive backing fabric. Usually I have sketched my design onto the foundation. When I work on my extended drafting table, I’m working at an angle. Using the cohesion between the fabric and foundation, pieces stay put pretty well just by smoothing them down by hand. When I was working on my pinning wall on “Crocodylus Smylus,” I used white flannel as a foundation. That had even more “stickiness,” allowing me to place fabrics temporarily without even pinning them in most cases.

Laying down the fabric on the foundation is the first level of permanence. Next comes pinning. When I can’t put down another piece without risking moving the others, I start pinning. I have adapted my work table with a homosote board. For my pinning wall I used 2-inch thick styrofoam insulation panels. When the work is flowing I’ll sometimes place fabric until I run out of pins. That can mean hundreds of pieces of fabric.
I’ll then have to start gluing.
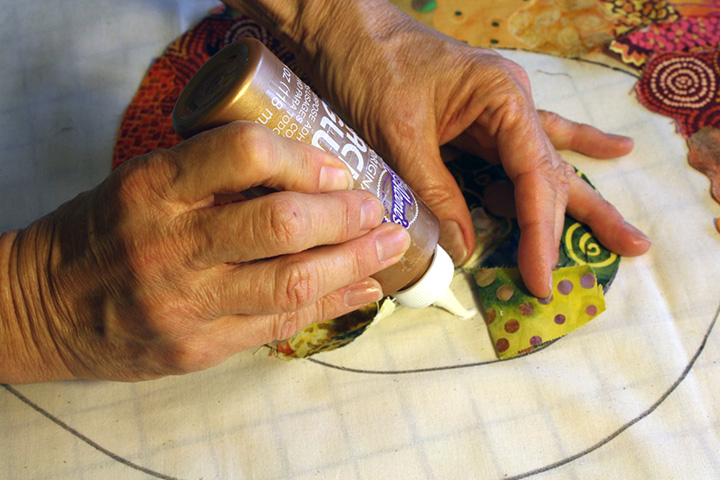
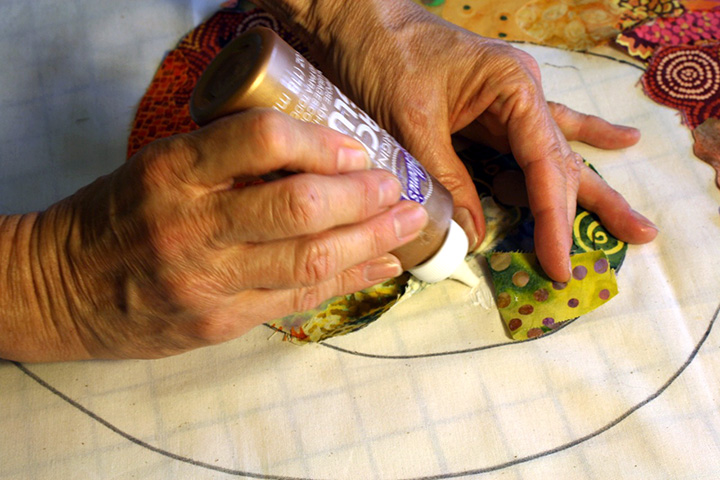
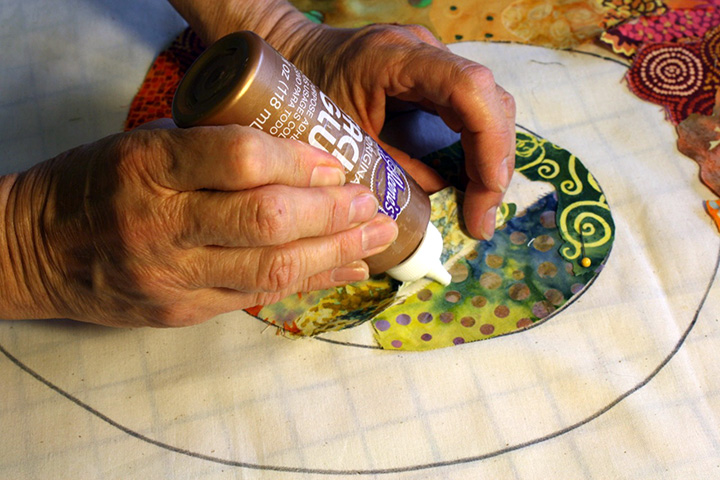
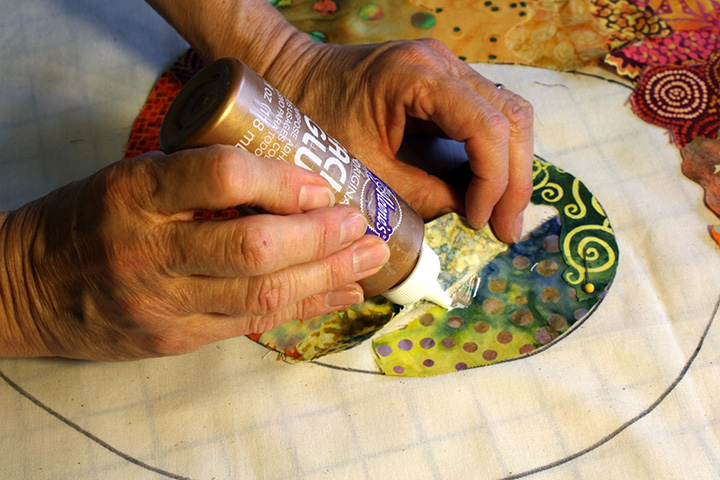
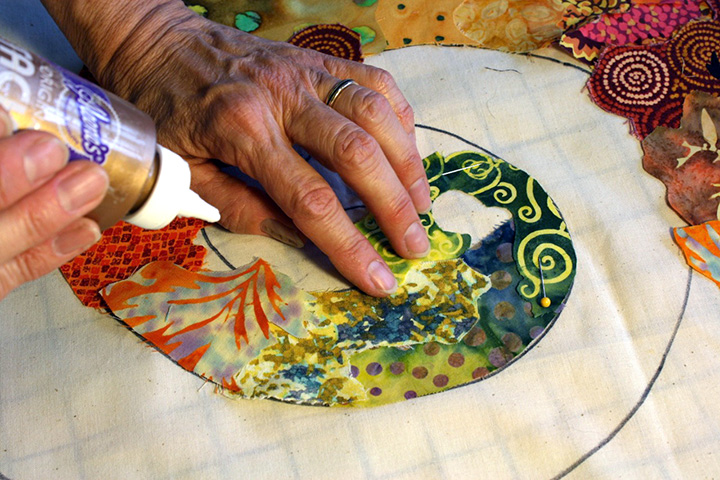
Aleene’s glue bottle has a nice tip. I simply lift an edge of the fabric and apply a small dab to the center of the piece of the fabric. Notice I said I apply glue to the center of the pieces. I leave the edges loose at this stage. I may want to come back and trim them down or slip another piece under the edge.
Once the dab is in place, I smear it flat. This prevents the glue from soaking through the fabric and creating spots. I use only a small amount of glue, just enough to tack it in place. This makes the piece stable, but still allows me to easily remove fabric if I decide I want to.
Once tacked in place, it will stay this way until piecing is complete. Before I begin quilting I have a decision to make. Occasionally, I will choose to place a fine netting or tulle over the entire piece. This is called shadow quilting. The netting holds down all the loose edges and prevents the quilting foot on my sewing machine from getting caught.
If I choose not to use tulle (which is most common), I now have to go back and glue down all those loose edges.
Yes, it is tedious. Thanks for asking.
“Dixie Dingo Dreaming” took me three days to glue all the edges.
When this stage arrived for “Crocodylus Smylus” (aka Stevie the Crocodile), I was pretty certain I would use shadow quilting just because the task of gluing seemed so daunting, but my husband, Tom, was against it. I said, “Fine. If you don’t want me to use tulle, you’ll have to help glue.” So he did.
It still took days.
When it’s done, the fabric is permanently attached. It doesn’t move without some real work. Since Aleene’s is water-based, dampening the fabric with a spray bottle can sometimes loosen the glue enough to lift. Usually it’s easier to apply new fabric right over the old if a change is necessary. And, by the way, these collage quilts of mine are not washable. They are art for the wall, not to be subjected to the washing machine any more than a watercolor painting.
Catching all those edges is important to me also because of the way I approach free-motion quilting. I don’t catch every edge when I quilt. Instead I use an overall loopy, spiral, stipple pattern. I aim to hit each piece but not each edge. The glue also prevents fraying, acting a bit like Fray Check without potential discoloration and smell.
Final Thoughts on Glue
So that’s the why and the how of using glue for fabric collage. I didn’t arrive at this way of working overnight. It was more than 26 years ago now that I started gluing fabric. Back then, using adhesives in quilting raised many an eyebrow. I even heard some say that my works weren’t “real quilts.” For some, I suspect, the use of glue is still viewed as “cheating.”
Well, in the last three decades, the rise in popularity of fiber art in general has stretched the definition of what makes a quilt. Quilting is a traditional art with a long and cherished history. The traditional methods of constructing quilts ought to be and are being maintained. But the popularity of art quilts has created an explosion of different techniques and styles. We’re doing things now that would have been unthinkable without experimenting with new ways of creating.
The humble glue bottle has helped me to be spontaneously creative. Of course there are other, possibly even easier ways of using fabric to create art. I see amazing fabric art in shows and on the internet all the time.
Will I ever set aside my glue bottle for a different way of doing things? Hmmm, not in the foreseeable future. But my work, and how I work, has evolved over time, so who knows? I think that staying open to new ideas and trying new paths are key to the creative process. Or I may cling to the way of working that I’ve grown accustomed to. It’s only human nature.

I love your work and read absolutely as much as I can. I’m presently working on my first collage piece. What batting do you use, thread and needle to quilt?
LikeLike
Love your work👍. I’d like to do a quilt like collage for out doors in the garden. Have you ever used the garden product to make garden fabric statues? Paverpol?
LikeLike
I thoroughly enjoyed reading all about how you design your beautiful quilts of art and am just starting to have a go at this
You were very helpful and I will be using your wonderful method and I agree totally that if you want a quilt for your bed then by all means sew but if you want beautiful art then glue .👍
LikeLike