Whew!
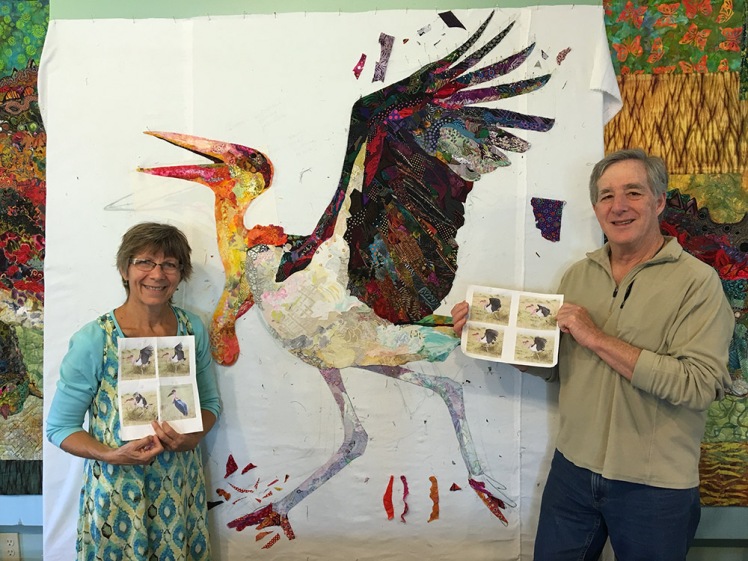
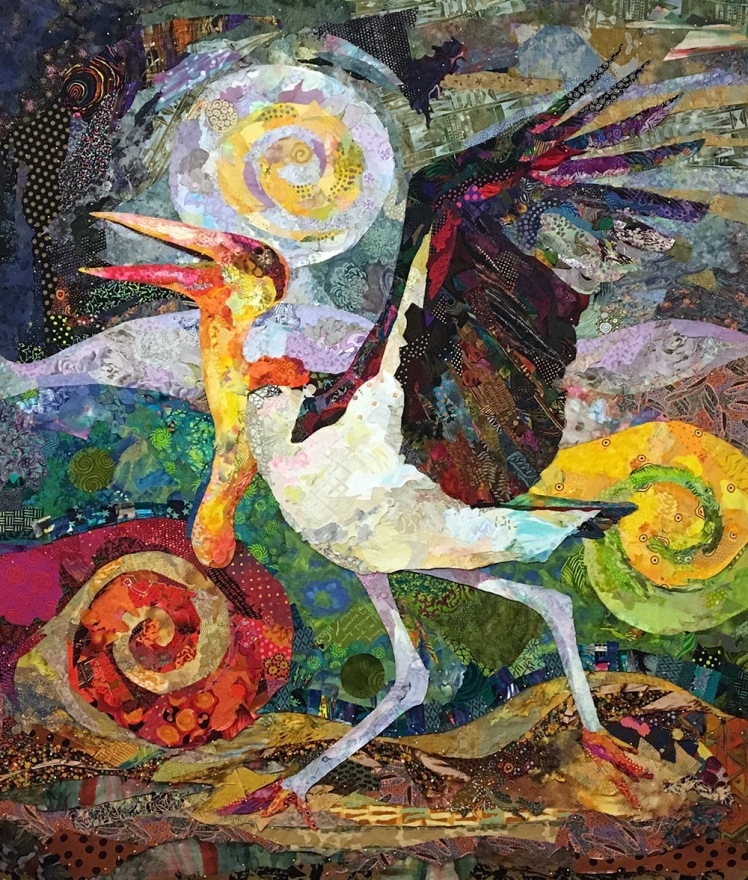
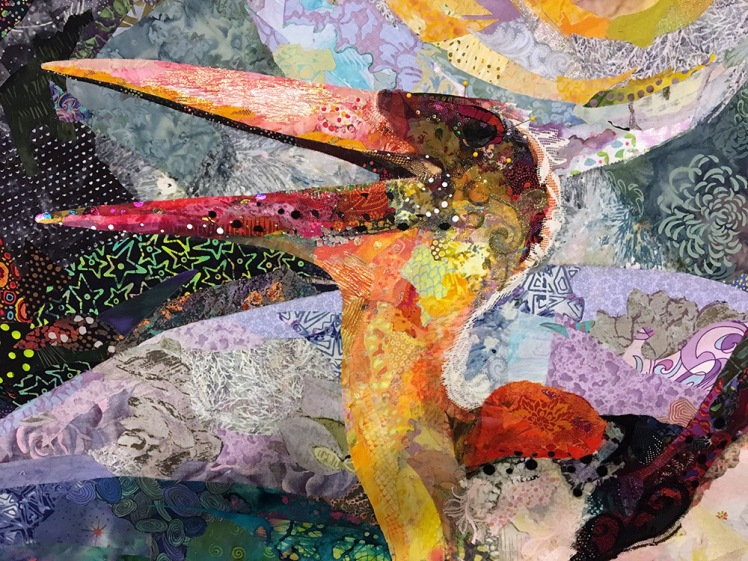
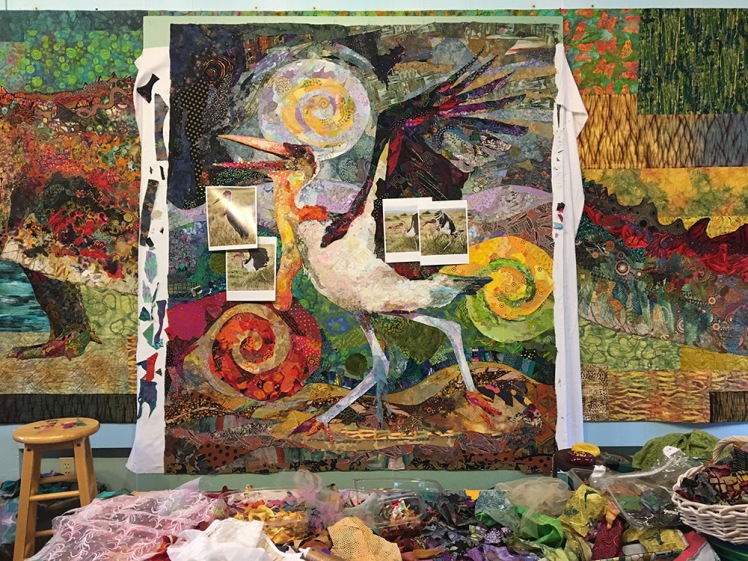
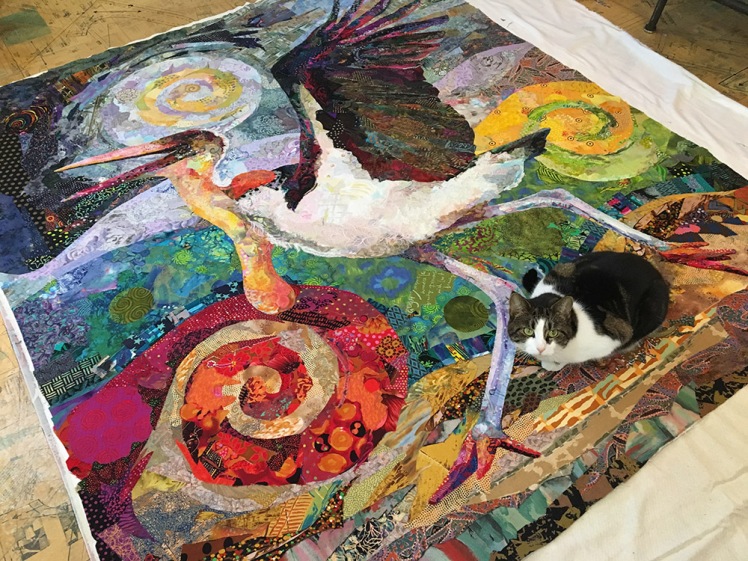
After an intense few weeks with little sleep and a lot of leaning on my family, the quilt of Chloe the Marabou Stork is finally done. I won’t make you scroll to the end. Here she is.

The title “Kaloli Moondance” was given to recognize the Ugandan name for the marabou stork—Kaloli Bird—and the beautiful harvest moon that shone down on those late nights as I was finishing this quilt.
I gave the making of “Kaloli Moondance” a similar time-lapse treatment as “Crocodylus Smylus.” See the video below for a two-minute version of the making of. The rest of this blog gives a more detailed look. Three previous blog posts cover the early stages of the construction. Here are links to Part I, Part II, and Part III.
In the end, this quilt took everything I had, even my blood when I pricked my finger with a needle. I worked right up to the deadline. On the last day, I finished the binding and sleeve, had it appraised (Thanks, Bonnie Dwyer!), photographed (Thanks, my husband Tom!), boxed and delivered to the FedEx drop off with 20 minutes to spare—making “Kaloli Moondance” the 11th and final quilt to arrive in Houston for my “Specimens” special exhibit at the International Quilt Festival in early November.
To be fair to myself, some family issues did step in to take away some valuable time, though I do tend to work right up to deadlines anyway. It seems to be part of my creative process. However, the all-nighters are getting a little harder than they used to be!
Speaking of Process…
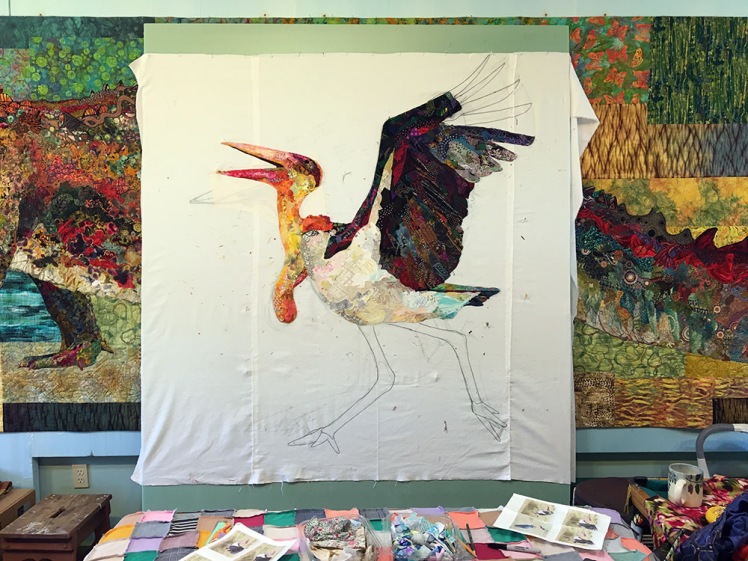
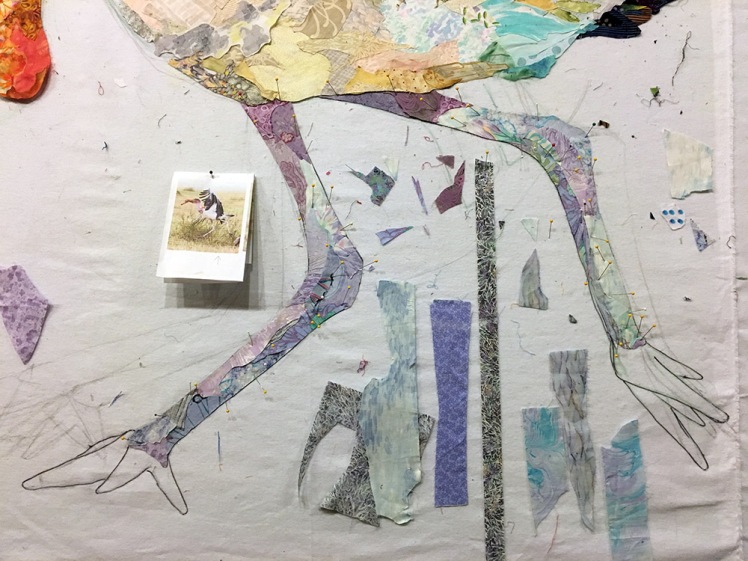
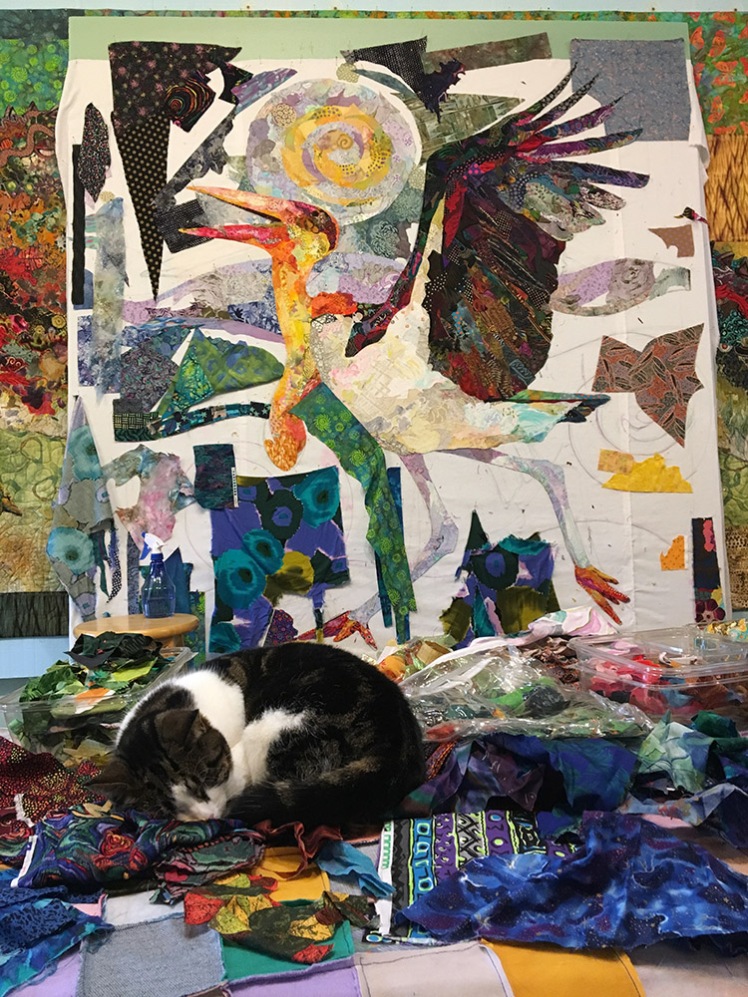
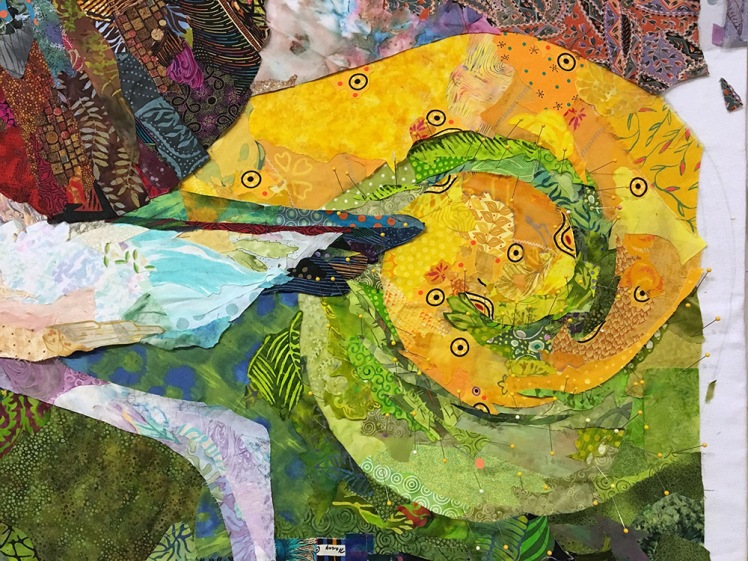
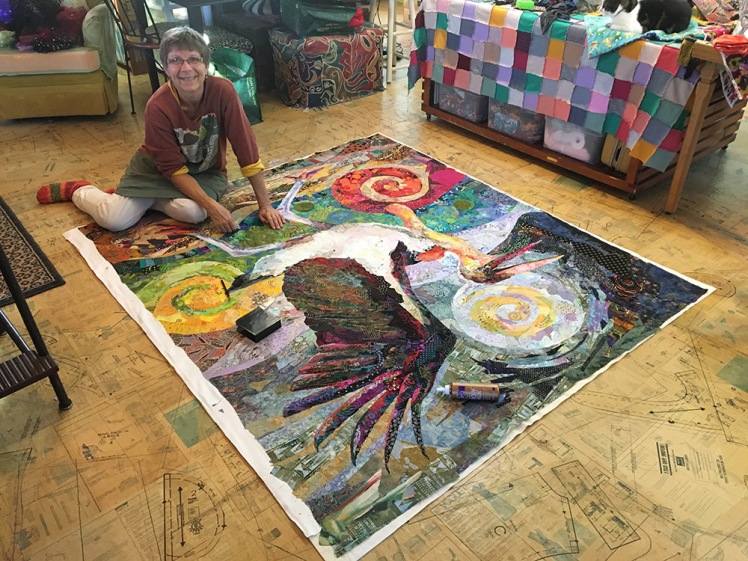
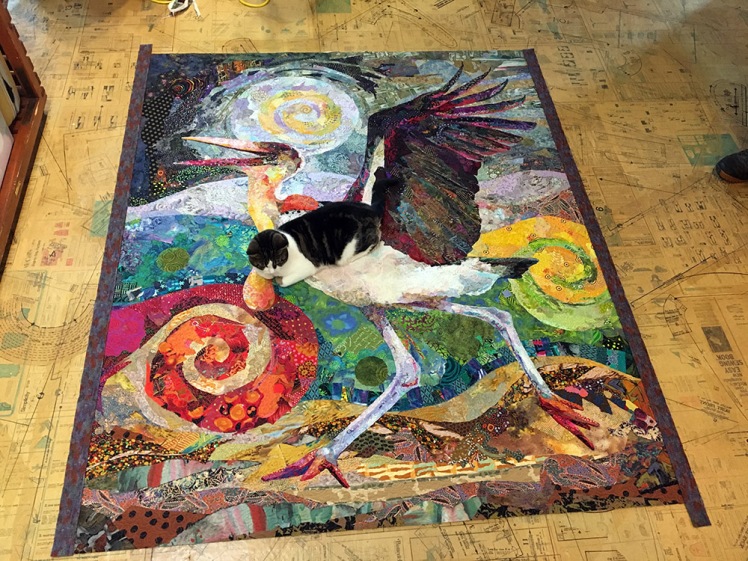
When you last saw Chloe, this is what she looked like:

I’d run out of space on my drawing board. It was time to shift her to a larger pinning board. In the photo above I’ve leaned a 6 x 8-foot piece of one-inch styrofoam insulation up against “Crocodylus Smylus,” which was fully occupying my studio pinning wall.
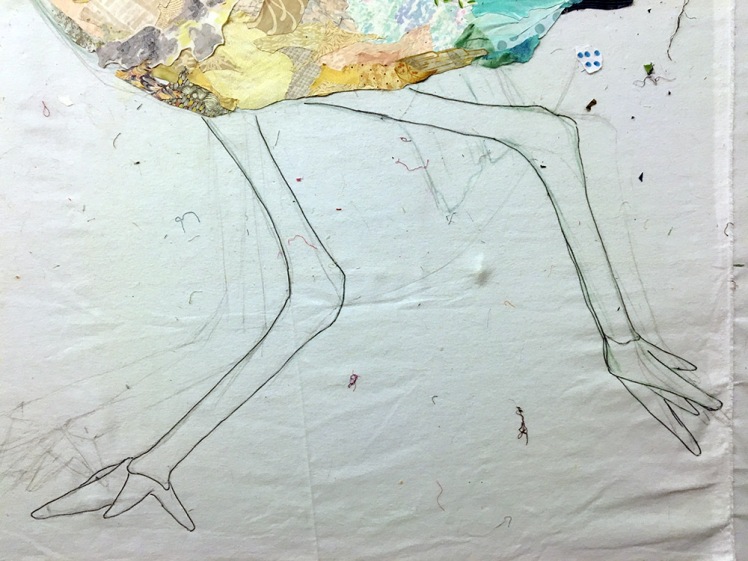
Once Chloe was transferred over, I had enough surface area to finish sketching out her legs and the upper tips of her wing.
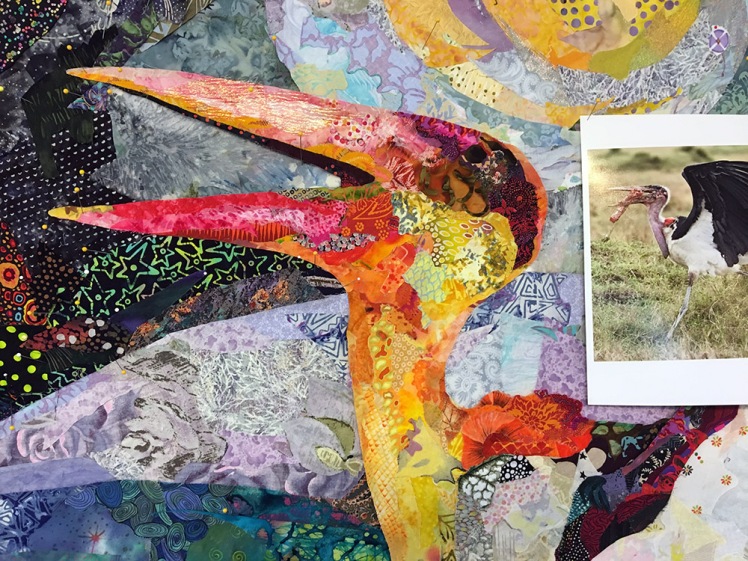
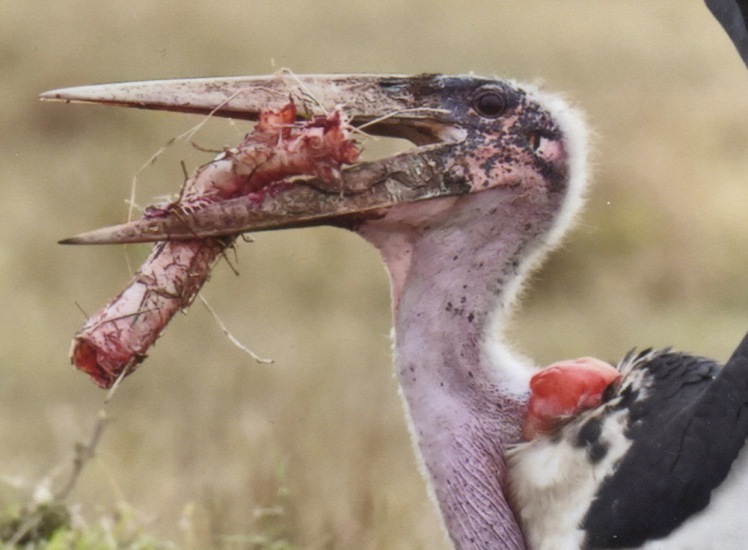
During this time, I had a visit from Joel Davidson, husband of one of my students Marilyn Davidson, who also stopped in to see Chloe. Joel is a talented photographer, who had generously allowed me to use his photographs for the design of my stork.
Background
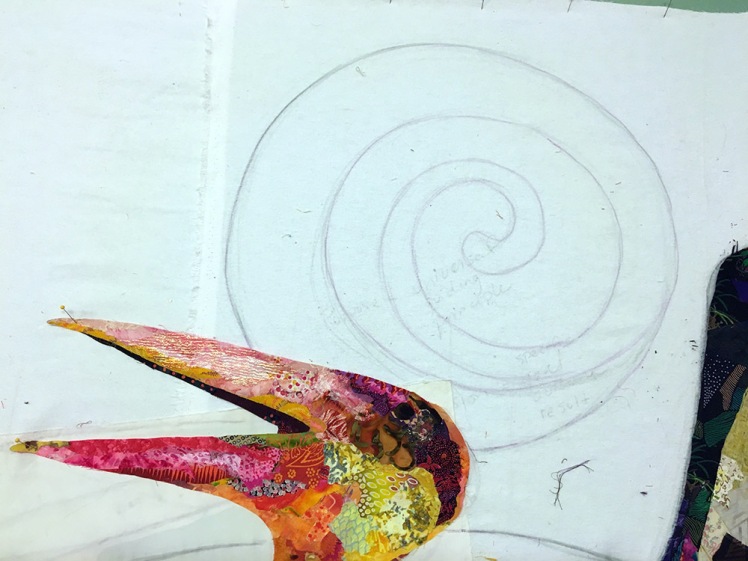
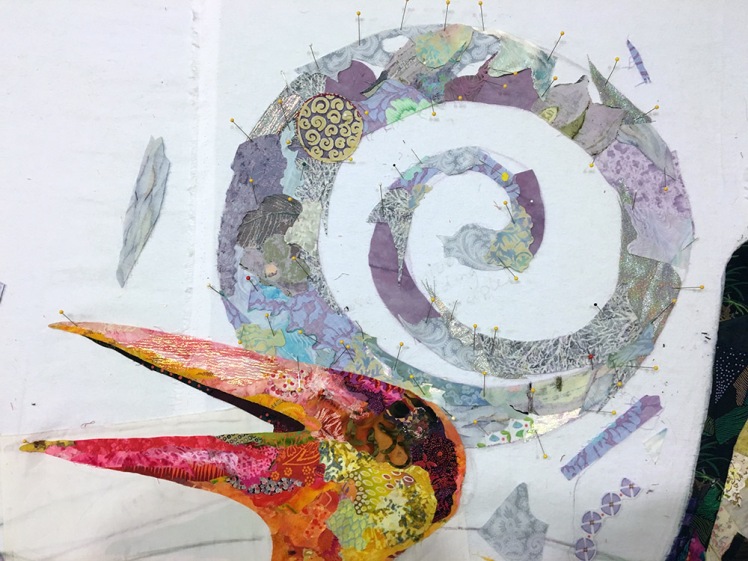
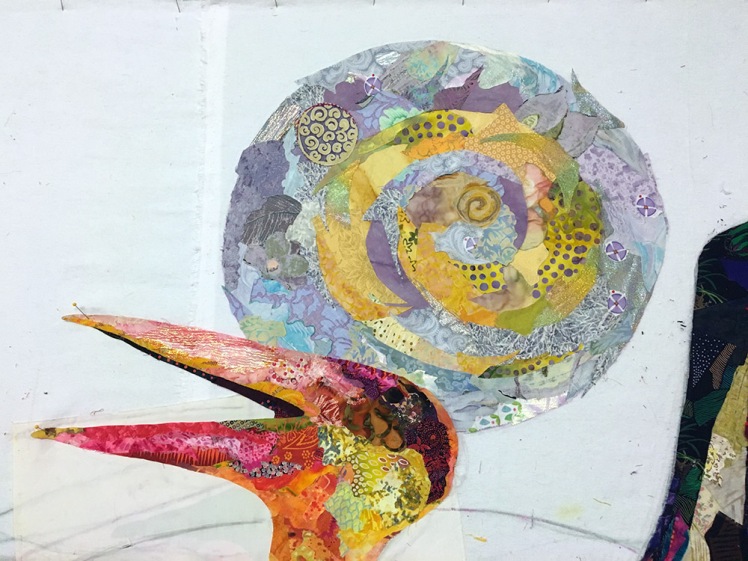
At some point I’ll have to devote an entire post to backgrounds. In this case, I had decided to continue using only scraps for the background as I did with the stork. But I needed to figure out what scene I was going to place Chloe in. Since marabou storks are native to Africa, it made sense to do a savannah of sorts.
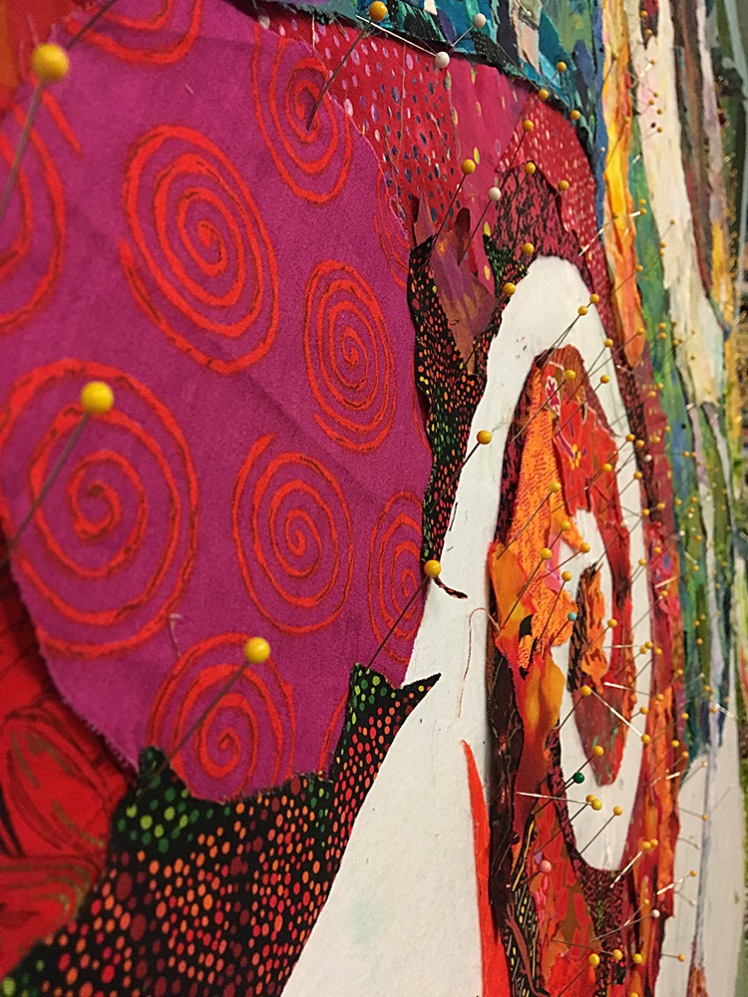
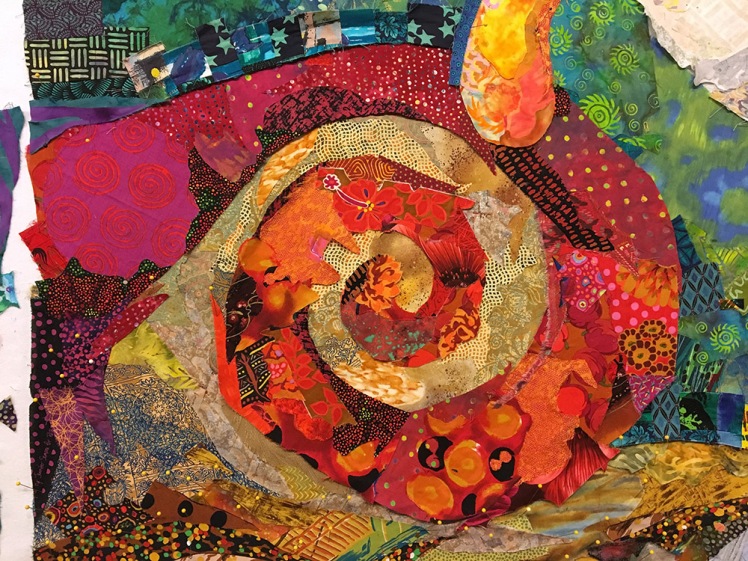
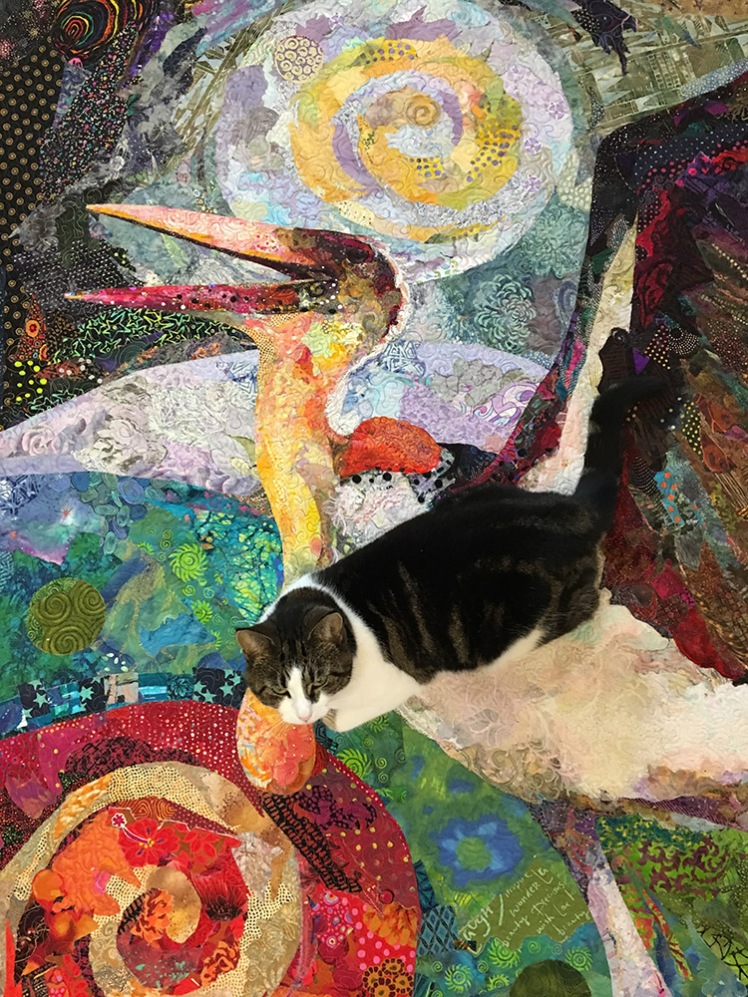
As timing would have it, I was deliberating this background as September’s Full Harvest Moon approached. I was working late—and early—hours in my studio, walking back and forth to our house in the moonlight. The thought of placing a full moon behind Chloe started to form… then adding the flowing landscape… then spirals to indicate movement of her “dance”.
The challenge of any background is to highlight the main image. This means avoiding colors and shades of color that are of the same value as the image itself. Now, Chloe has both very dark (wings) and very light (belly and legs) parts of her, posing potential problems with a cohesive background.


Finetuning
When I reach this stage (third draft/”dental draft“/final draft) I often make a list of things that need attention.
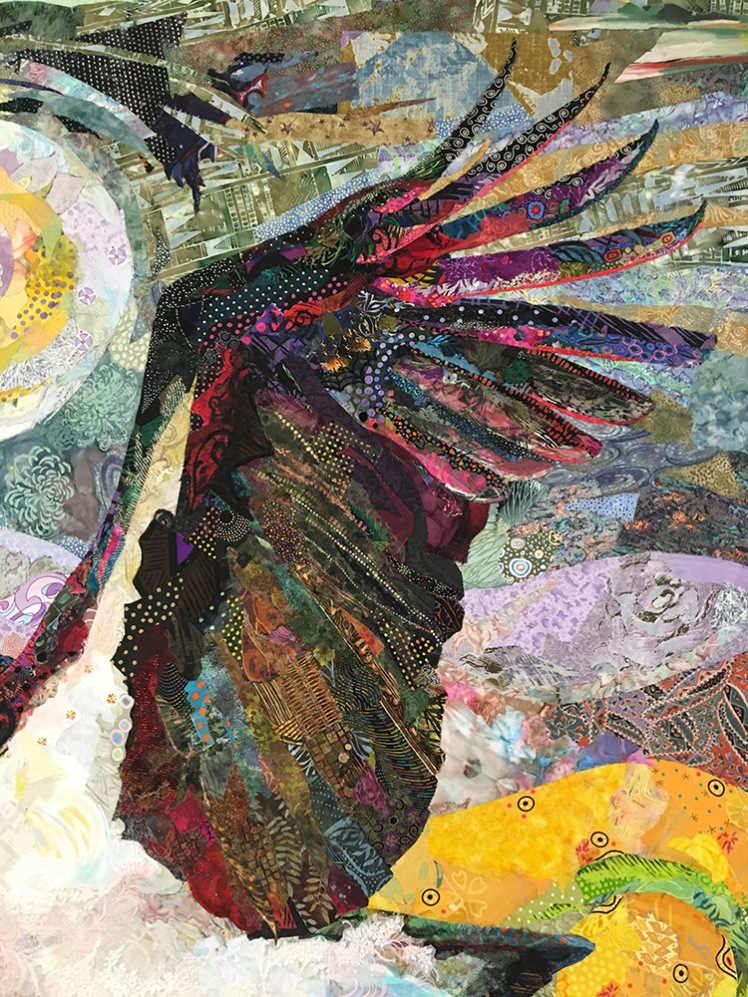
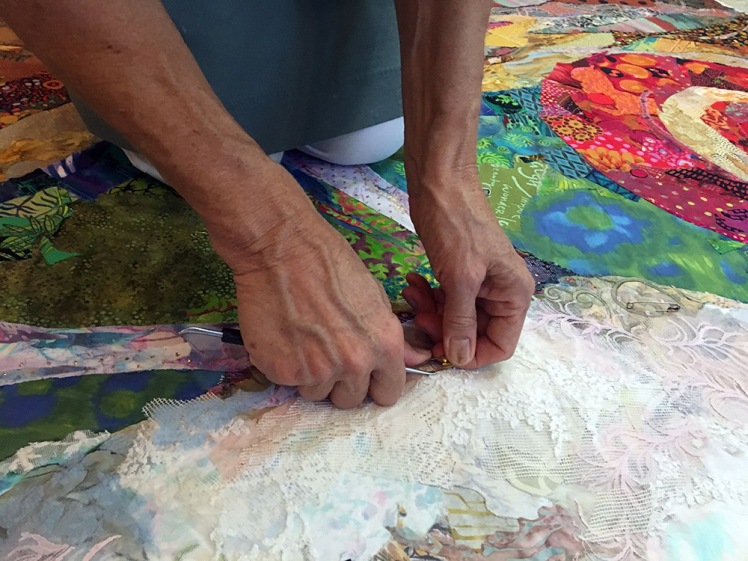
There was something about her eye that was bothering me (and Tom). Finally, by comparing her to Joel’s photo, we figured out it had to do with her beak. The opening wasn’t deep enough, which made the eye seem like it was too close to the back of her head.

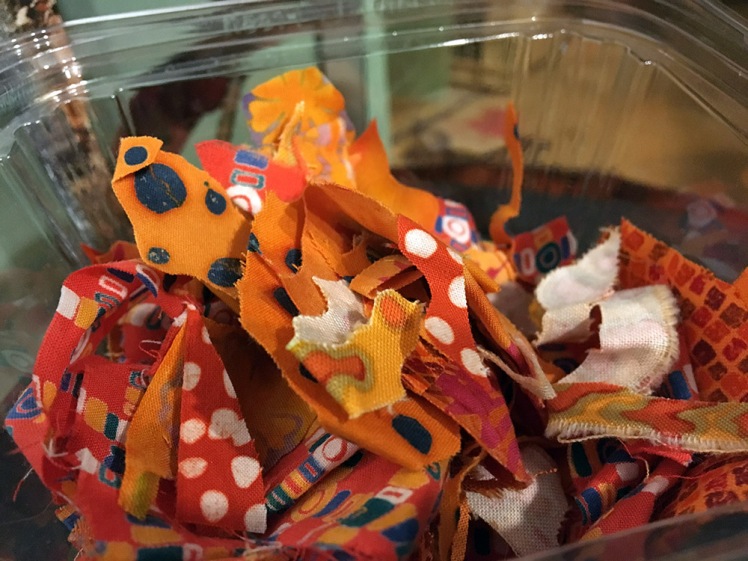
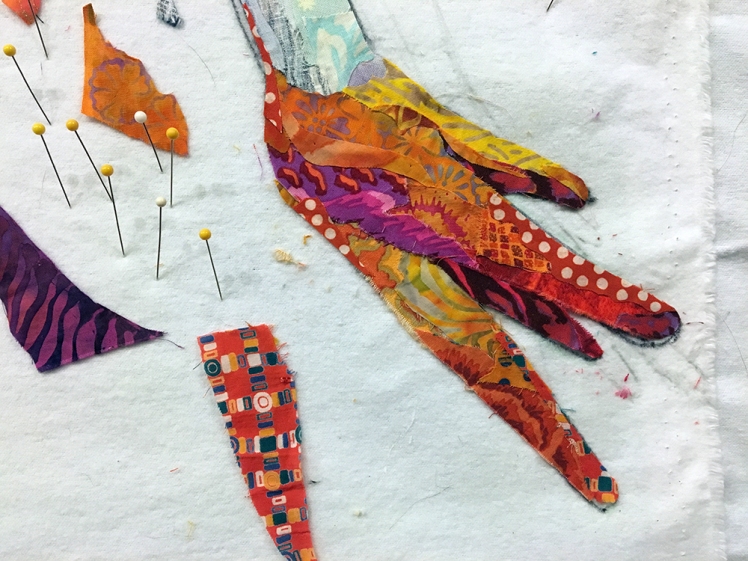
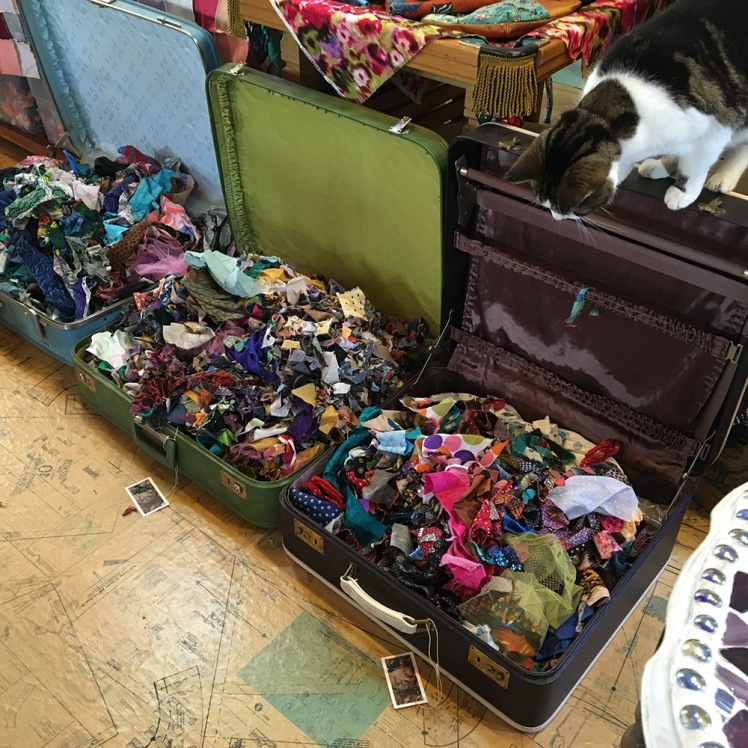
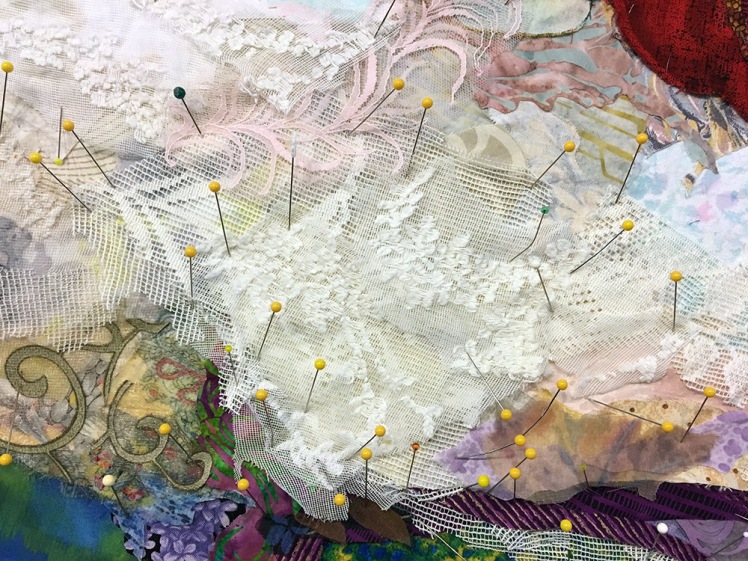
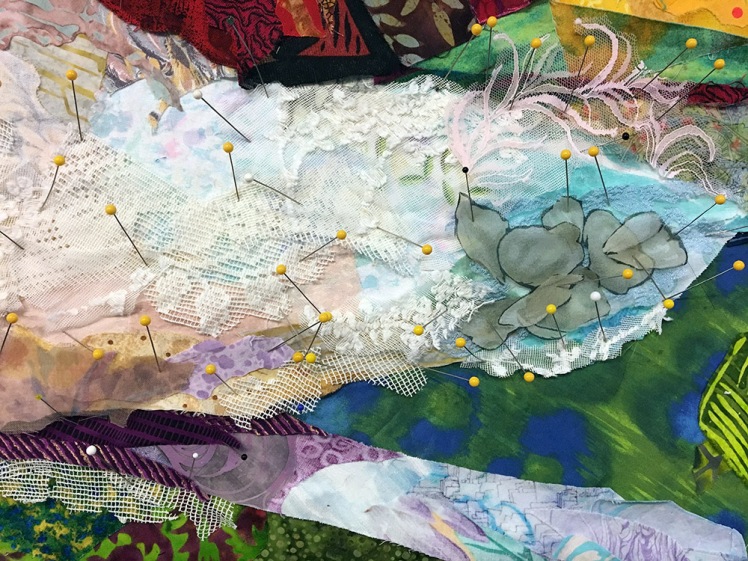
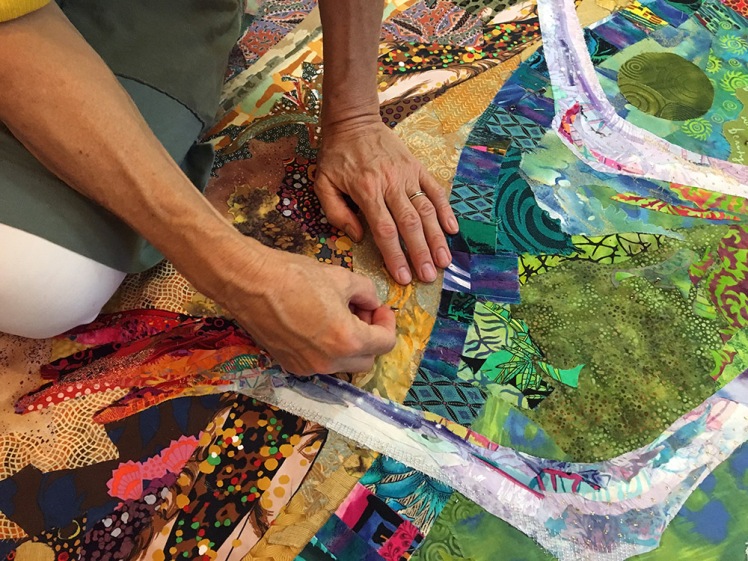
Another area I wanted to enhance was the chest and belly, adding form to the variety of white and pastel colors. Still scrounging through my scrap suitcases, I found several different kinds of lace and other sheers to layer over Chloe’s abdomen, adding some texture to her feathers.
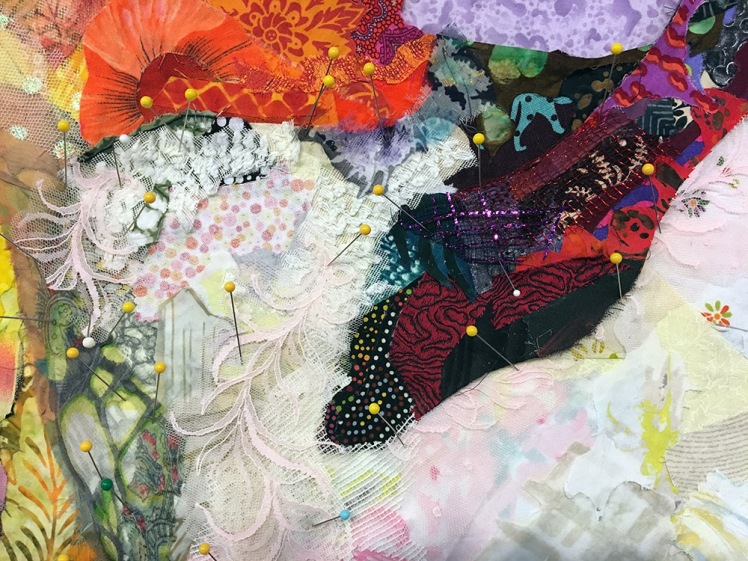
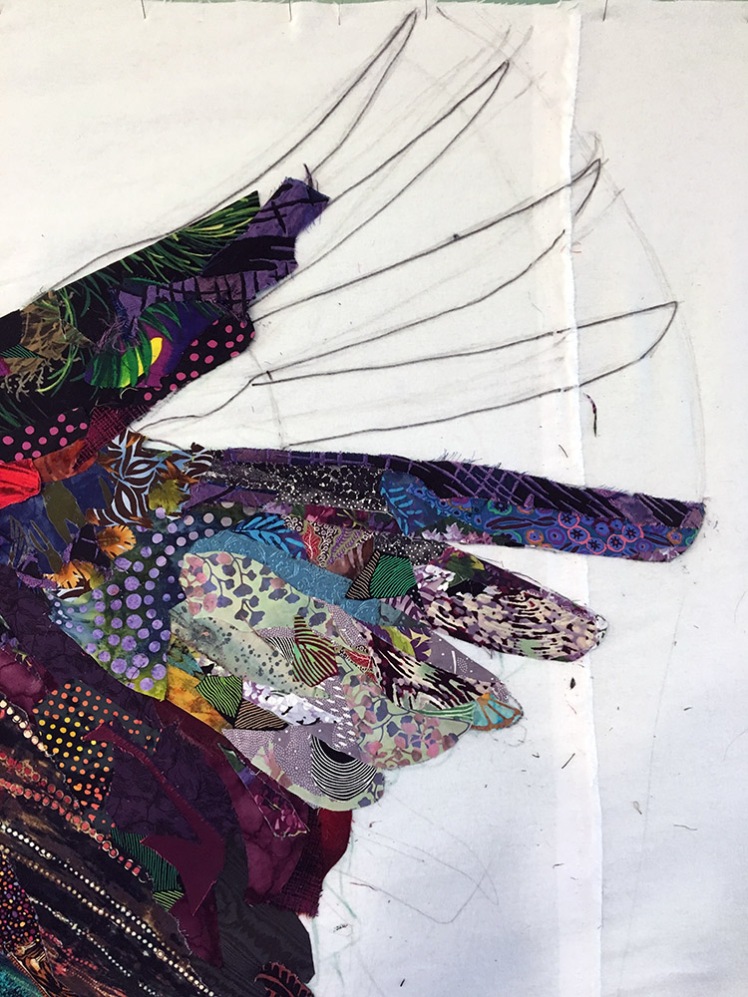
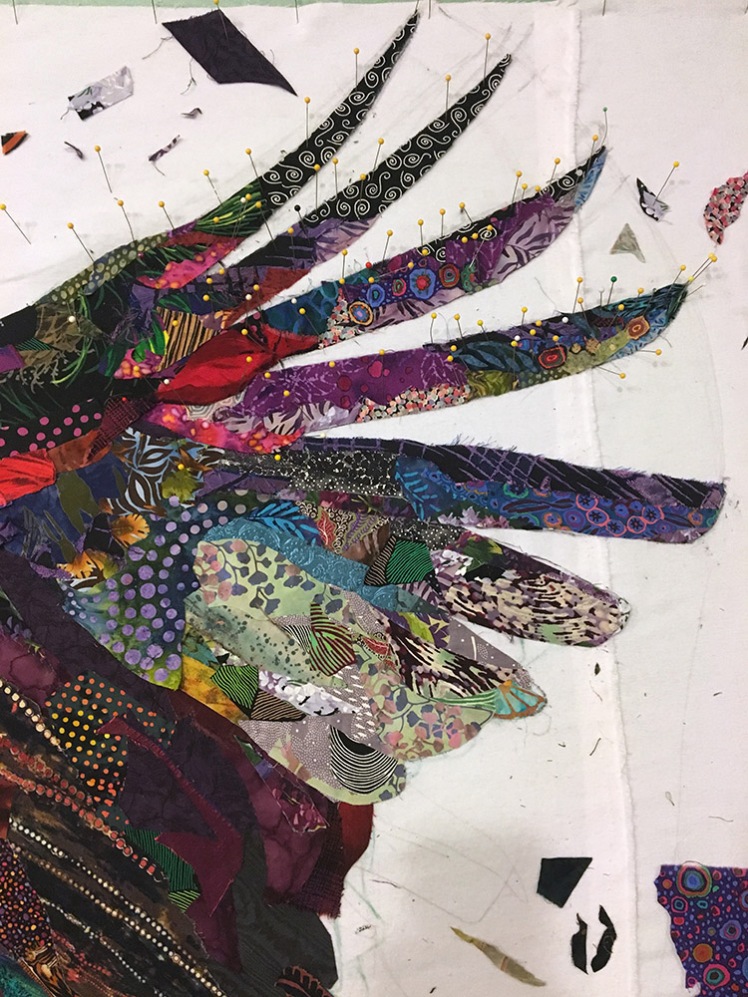
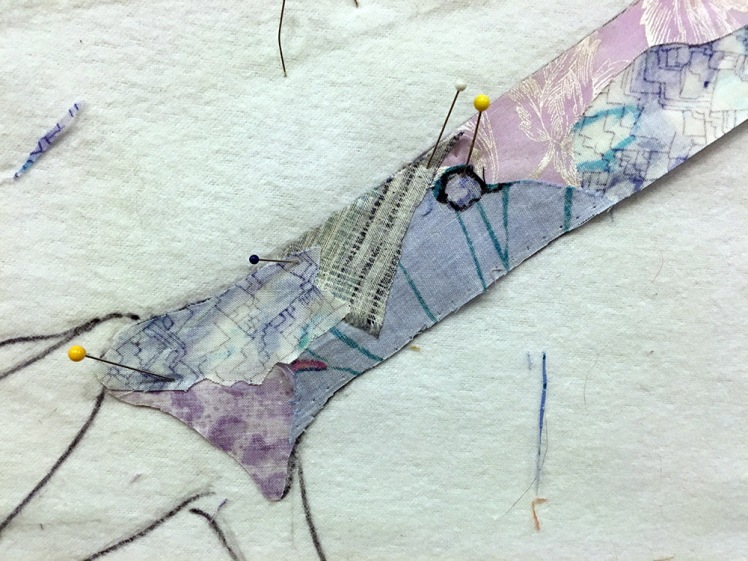
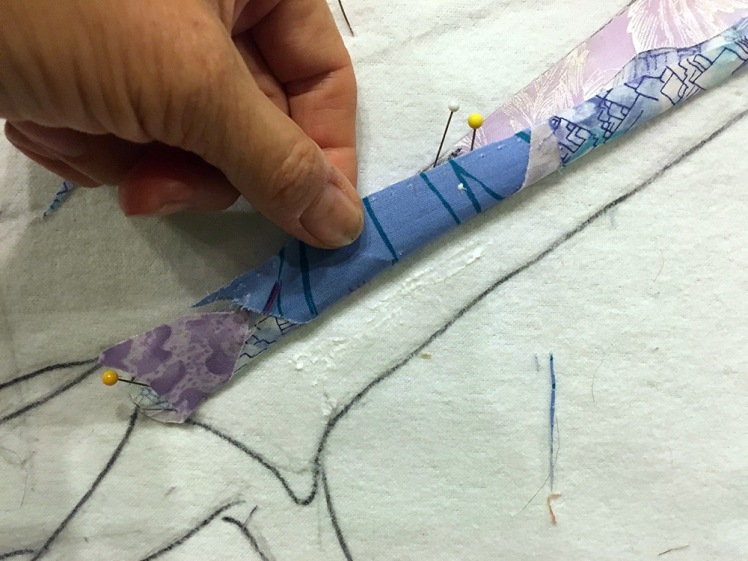
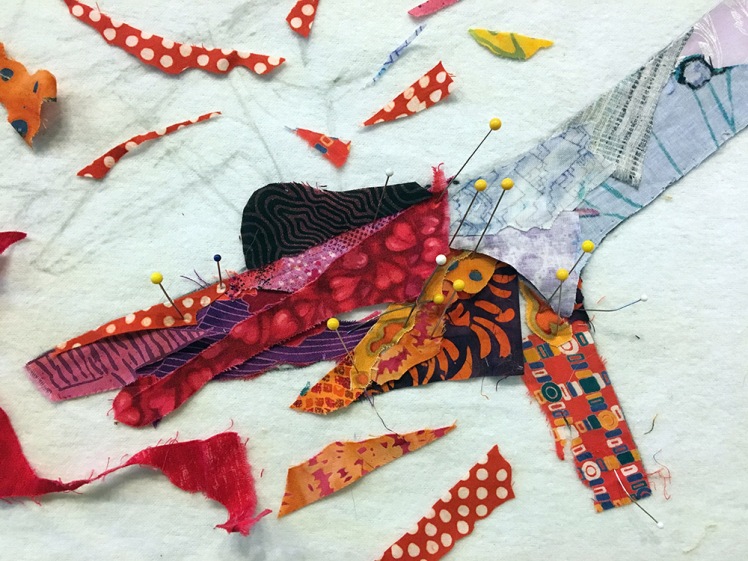
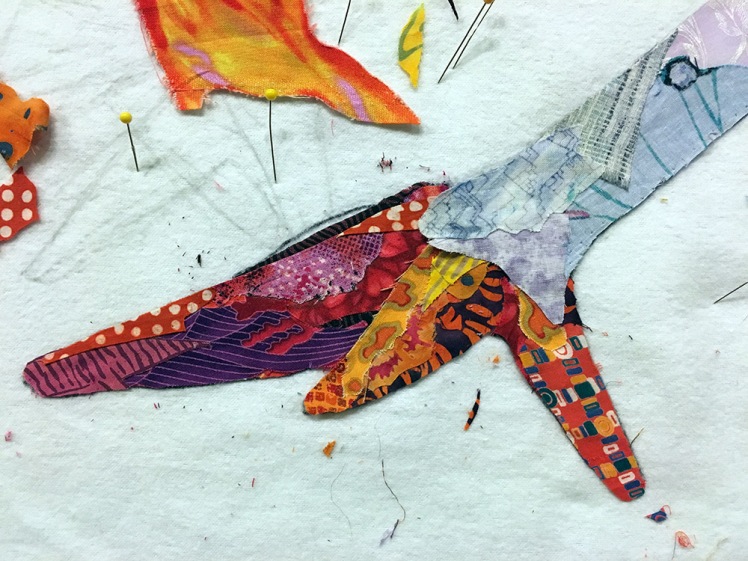
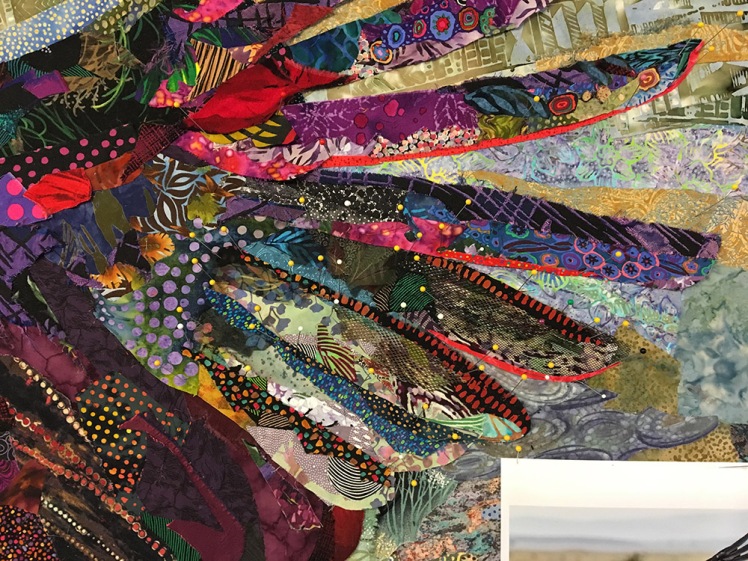
In the photo below notice how the edges of the upper wing feathers are not clearly delineated from the background.
I chose to solve that by darkening and adding bright red highlights to the lower edges of the feathers. I don’t suppose it makes literal sense—where does the red light come from?—but it does help keep the wing tips from blending into the background.
Finishing
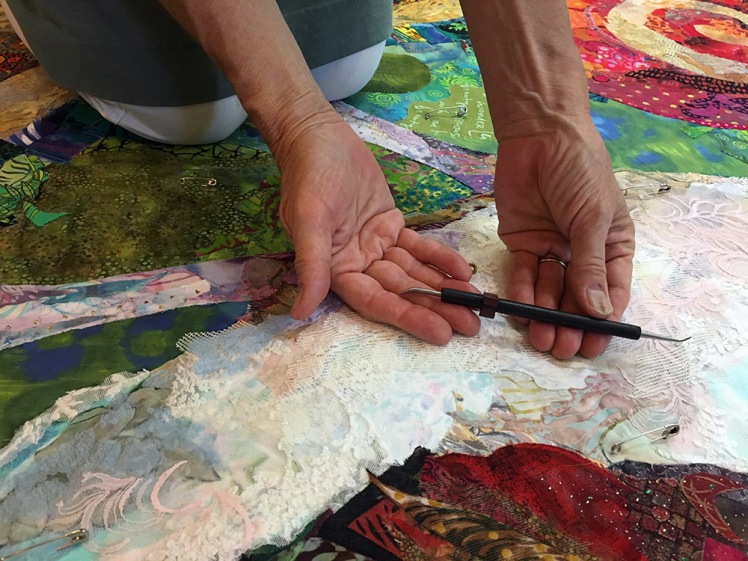
Once I’d gone over the image with a fine-toothed comb, I started the finishing process. First I laid the glued image on the (vacuumed) floor of my studio and layered it with thin cotton batting and backing. I used safety pins to baste the layers together for quilting.
I quilted the piece using my good old reliable home model 1530 Bernina. But despite being adept at the quilting process, it always takes longer than I think it will.
Once it was quilted, I squared up the piece—laying it on the floor, trimming the edges with a rotary cutter, and deciding to use a faced binding. I attached a binding strip to the front of the quilt, top stitched, then turned it to the back, pinned and hand-stitched it in place. In this way the top image goes all the way to the edge.
Finish
And that was that. No time for long goodbyes. Off she flew to Houston. And I had only a couple days to rest before hosting the second of my October’s Maine quilting retreats, this one the first held in our state’s largest city of Portland.
When I have time to further reflect on the making of “Kaloli Moondance,” I’m sure that all the stress and lost sleep will begin to fade in my memory. Rather like the labor of childbirth, if we didn’t forget the pain we’d never do it again.
The process of creating isn’t always so laborious, but it is work. Enjoyable work, but a labor nonetheless. What keeps me going is a love of this work. It would have to, wouldn’t it? Otherwise I would never devote hundreds of hours to a single piece.
So, what’s next? What image will capture my attention? Will I do a vulture, the scrappy scavenger I had originally in mind? I have no idea. Let me catch up on some sleep and I’ll let you know.

I love your work, thanks for sharing
I go to Houston, so I see it all in real 😉 I am in love with the pink rinoceros
groet Ineke Marijnissen-van der Molen Holland
LikeLiked by 1 person
I love it! Thank you for your wonderful explanation of your work process. A question: does quilting after you have glued not damage your machine? (Obviously not, but how does it affect the machine?) Thanks again, Norma
LikeLiked by 1 person
The glue I use, Aleene’s Tacky Glue, dries completely. It’s also flexible. And I use only as little as I need. No chunky areas. So, no it doesn’t affect the needle or machine at all.
LikeLike
Susan, I have so enjoyed the “journey” of Chloe from start to finish. She is exquisite! I am new to collage quilting and learn so much from your posts. I sincerely hope to have the opportunity to take a class with you some day. I know I deserve a trip to Maine 🙂 I am actually taking a class today from Sue Hickman on her fractured flower technique and saw a piece in her studio that I knew had your influence. She told me she was lucky enough to take a class with you in Manassas, VA at the local guild. Thanks for the posts. Kim P
LikeLiked by 1 person
She’s absolutely stunning!!!
On Saturday, October 22, 2016, Susan Carlson Quilts wrote:
> Susan posted: “Whew! After an intense few weeks with little sleep and a > lot of leaning on my family, the quilt of Chloe the Marabou Stork is > finally done. I won’t make you scroll to the end. Here she is. The title > “Kaloli Moondance” was given to recognize the Uganda” >
LikeLiked by 1 person
Magical!
LikeLiked by 1 person
She is beautiful, enjoying her dance in the moonlight. Thank you so much for sharing your journey with Chloe with us! Hope your opening in Texas is glorious!
LikeLiked by 1 person
Your Kaloli is so full of joy! She makes me smile just to look at her. Have a great time in Houston!
LikeLiked by 1 person
Thanks again for your amazing and generous posts! My quilt-y guru rocks!
LikeLiked by 1 person
It is stunning! And thanks so much for the ‘process’ photographs — really gives an appreciation of the methodical way you put these beautiful creations together. I just love the vibrancy and the movement this quilt exhibits, and the background really adds a whole different dimension! Bravo, Susan, can’t wait to see the next piece!!!
LikeLiked by 1 person
This is just wonderful, both the step by step and the video. One Question, did you put voile over the whole piece before quilting od do you glue each piece securely? I am doing some little collage pieces on a whole cloth background so am just using the voile over the image.
LikeLiked by 1 person
No voile, or netting or tulle over the entire piece. I rely on glue to secure each piece before quilting, which is tedious and time intensive, but eliminates any dulling (or at least changing) of the colors of the fabrics that can be caused by an overlay for shadow quilting.
LikeLike
Ah…. thanks. I guess once you have secured each piece you can then quilt it quite tightly – will have to try that next time.
LikeLiked by 1 person
Just so inspiring. Your book is always at hand for those many “go to” tips that are esential. lovely……. thanks
LikeLiked by 1 person
She is absolutely fabulous!
LikeLiked by 1 person
I so look forward to your posts each week! Your process fascinates me – one of your classes is on the top of my bucket list! And when I see a piece of fabric you used that I actually have too, it instantly becomes a TREASURE! I’ve learned so much from you. I intend to do your beautiful turtle and am saving up bits and pieces for that. I have your book and pattern and just need to take the leap!!! Thank you for sharing with us!
LikeLike
Chloe is fabulous and so are you! You are generous in detailing the process. I love reading your blog and learn so much. I am not sure I have seen anyone else being so generous in sharing their knowledge!
LikeLiked by 1 person
Absolutely stunning!
LikeLiked by 1 person
Your work is absolutely stunning! Thanks so much for sharing your talent and creative journey with us!
LikeLiked by 1 person
Hi Susan, I am so looking forward to your quilt class at Tahoe! You mention that we might want to send a photo of the design or image we want to work with – great idea. I’ve attached what I hope will work. This is a low res image, the one I intend to use is larger.
My intended size is approx 18 inches wide by 24 inches deep, or maybe a bit larger… I’ll wait to hear back from you.
Thank you!!
Susan Pinkerton
LikeLiked by 1 person
I’m sorry the image didn’t come through. You should send it to me via email: susan@susancarlson.com
LikeLike
Susan, why use pins for basting? My construction technique is similar to your own and I just use a spray glue to baste the layers together. Because there’s a muslin base which the design is attached to, the whole thing can be lifted and placed on the batting. Lift half, spray the batting, replace and repeat. Easy peazy.
LikeLiked by 1 person
I like the idea. My only reservation as I talked about in my post “WhyGlue?” is the nasty fumes from the spray glue. Do you have to ventilate your studio?
LikeLike
Susan, I just wanted to take a moment and let you know how much I enjoy reading your posts. Chloe came out so amazing! I wish I was going to be in Houston this year to see the show. Enjoy your next retreat in Maine. Hopefully, I will be able to see her in Asilomar this year. By the way I would still love to see you do the octopus you had mentioned one evening at dinner. 😉 With love and best wishes, Suzie from Arizona
Sent from my iPad
>
LikeLiked by 1 person
Thank you so much for sharing both the process and the end product. It is exquisite!
LikeLiked by 1 person
I learn more with every blog. This one had several “a-ha” points for me. Houston is in for a treat. Enjoy!
LikeLiked by 1 person
Absolutely awesome. I LOVE her. I can feel her joy!!!
LikeLiked by 1 person
Chloe’s a stunner, Susan! Congratulations on her successful completion and thank you so much for sharing your journey with us. I learn so much from each of your projects.
LikeLiked by 1 person
Wow, she is gorgeous! Thank you for going into such great detail and showing the close up photos. I absolutely love reading your posts, thanks!
LikeLiked by 1 person
I am going to Paducah in the spring. . . .would it by chance be going there after Houston? And you?
LikeLiked by 1 person
I have no plans for the show after Houston. I am going directly to Tahoe to teach at Art Quilt Tahoe.
LikeLike
She is outstanding! Thank you SO much for sharing the process with us-you are truly generous and I learn SO much! I hope to be able to take another class with you some day!
LikeLiked by 1 person
Thanks Susan, for including us in your process. Such a beautiful interpretation, as always! I admire your work and your generous spirit!
LikeLiked by 1 person
Susan, So beautiful—your process is amazing and you have the eye to make your collages come out just right—want to do a collage one day!! Thank you!!!
LikeLike
Absolutely love this quilt and thank you for such detail on the process. What lovely music did you use for the slide show?
LikeLiked by 1 person
Thanks, Paula. My husband says the music is stock from the program he used to assemble the slideshow.
LikeLike
Congratulations She is beautiful. I looked forward each day to see the progress you were making. Amazing.
LikeLiked by 1 person
Thank you for sharing all of your knowledge and talent on your blog,it’s always a joy to read.
I have a non quilting question. Your floor is wonderful! How did you do it? Please….
Thanks again Lucinda
LikeLike
Just amazing! I’ve just learned about this process and appreciate so much that you show each step in detail. Thank you so much for making this seem a little less daunting. I was happy to learn this could be done without the fusable web. My question is, how do you apply the tacky glue without making a huge mess and getting it on the front of the fabric? Do you use fingers or a brush? Do you thin it at all? Any tips on that would be most appreciated. Thanks again, Sue
LikeLike
I loved your step by step blog..it helped refresh my skills from your class in Melbourne 2016. I can relate to the sleepless nights to meet a deadline…I am currently working on a triptych piece for my daughter’s flute masters project to be premiered in Belgium. Each panel measures approx 7′ tall x 4′ wide. I am doing a landscape, using Aboriginal fabrics only designed by local designers (challenging with a limited range of fabrics!). I was asked to do the piece in late January and have to have it finished by early May, to take over to Belgium with me when we travel. No all nighters yet, but I’m sure they will come…my challenge is I run my own small quilting business, so I don’t have the opportunity to work on it during the week days, but do early morning and late night sessions through the week, and then all weekend. Looking forward to sharing photos with you once it is done. Cheers, Terri. PS. My yellow and purple cockatiel is not finished, but I am now inspired to get it out again and get it done after I get back from my trip overseas for the recital.
LikeLike
So u don’t see the raw edges down ir anything u go straight to quilting. That holds the edges and everything down
LikeLike
The edges are visible if you look closely. The glue holds everything down pretty well. The overall stitching hits each piece but doesn’t catch each edge. That’s just too picky for me. Plus it would change the look by outlining each piece.
LikeLike
Will you be putting out a pattern for Chloe. I love this quilt she is gorgeous. You did such a beautiful job! Would love to find out about online classes
LikeLike